EasySense Link is an M-Bus gateway application for the Teltonika TRB143. It reads wired and wireless M-Bus meters, publishes the data via MQTT, and optionally exposes a Modbus TCP server and a local web portal. This guide covers day-to-day configuration and operation. If Link isn't installed yet, start with the Setup guide.
Overview
Link runs autonomously on the TRB143. Once configured it continuously polls your meters, parses the readings and forwards them to the EasySense platform (or your own broker). The same data can be served to a building-management system over Modbus TCP. A local web portal on port 8000 is always available for configuration and monitoring.
First login
Open http://<device-ip>:8000 in a browser. The portal requires a password — it is the TRB143 serial number, printed on the device label.
License & features
Link requires a valid license to operate. Without one, meter reading is disabled and all optional features are locked. Each license enables a specific set of features:
| Feature | What it enables |
|---|---|
mqtt | Publishing to your own (user) MQTT broker |
modbus | Modbus TCP server |
wireless | Wireless M-Bus via the RelAir R2M gateway |
max_meters | Maximum number of meters (unlimited if not set) |
Installing or updating a license
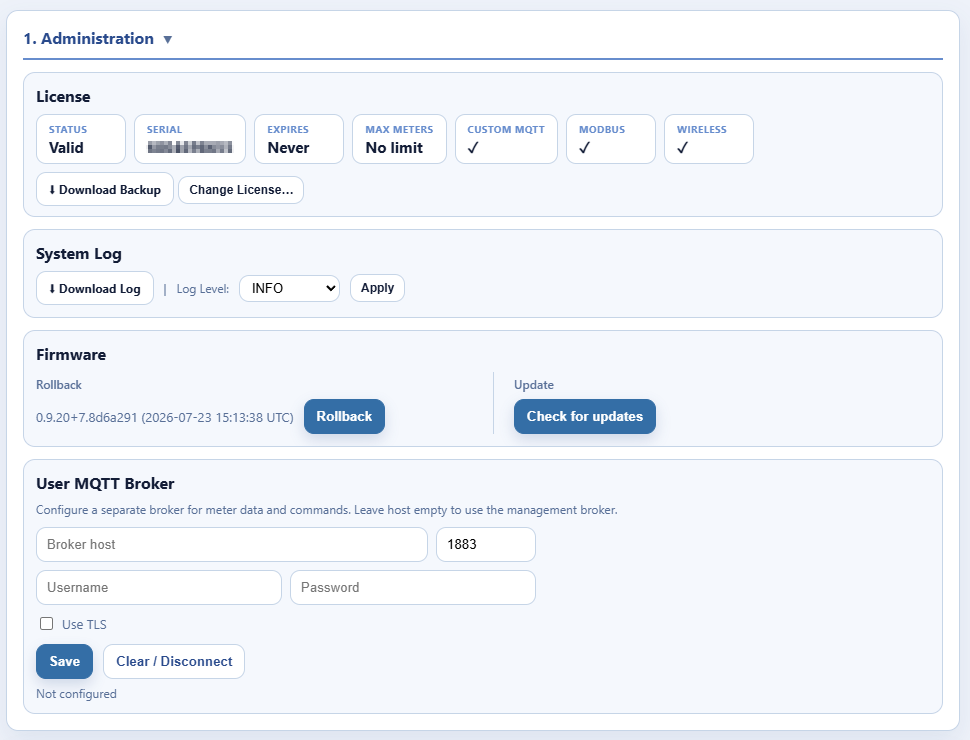
In 1. Administration → License you can either enter an activation code for online activation, or upload a .dat license file with Choose File → Install. The License panel shows the current status, serial, expiry, meter limit and which features are enabled.
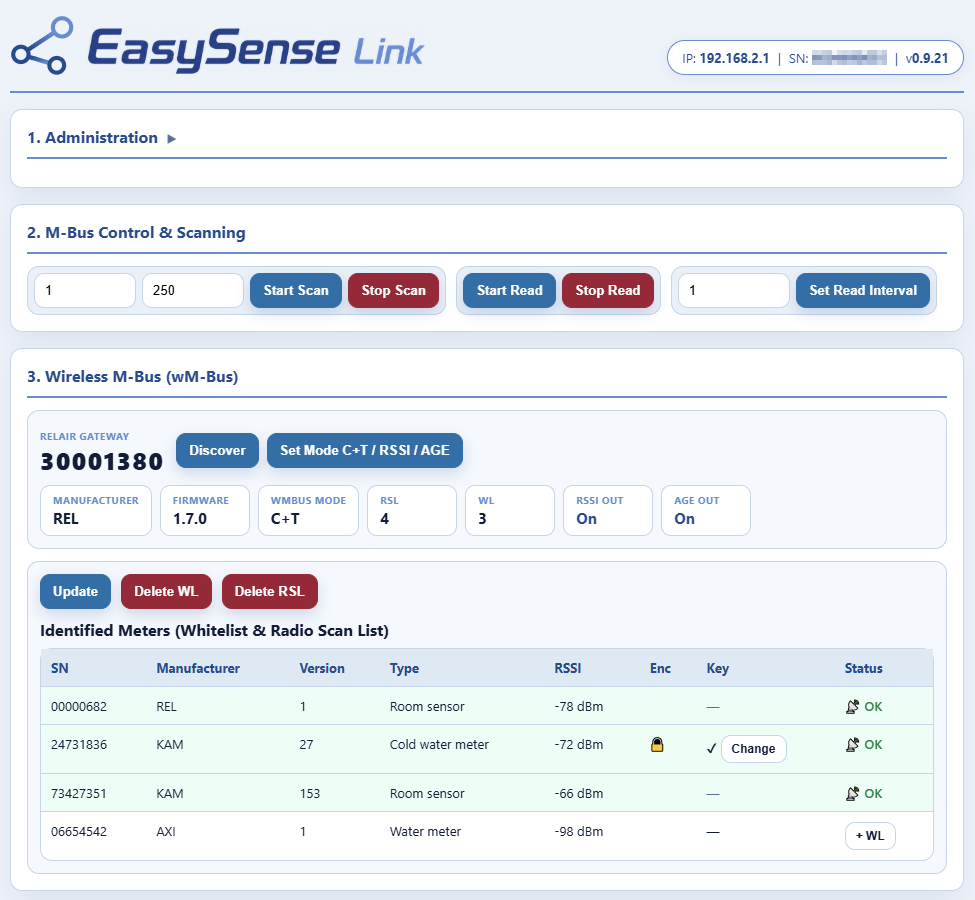
The web portal
The portal is organised into numbered, collapsible sections:
- 1. Administration — license, firmware updates, system log, log level and the user MQTT broker.
- 2. M-Bus Control & Scanning — scan for wired meters, start/stop reading and set the read interval.
- 3. Wireless M-Bus (wM-Bus) — RelAir gateway, radio scan list, whitelist and AES keys.
- 4. Meter Administration — add or update wired (primary) and wireless (secondary) meters.
- 5. Live Values — latest readings from the connected meters.
- 6. Modbus — enable/disable the Modbus TCP server and set the port.
- 7. Modbus Register Mapping (Trend) — map meter values to Modbus registers.
- 8. Modbus Register Overview — the current register layout exposed to Modbus clients.
Not all sections are shown — the available sections depend on the features enabled by the installed license.
Wired meters
Wired meters connect via the TRB143 M-Bus interface. Each has a unique primary address in the range 1–250.
Adding meters
- Automatic scan — in 2. M-Bus Control & Scanning, set the start and end address and click Start Scan. Discovered meters are saved automatically.
- Manual — in 4. Meter Administration → Primary (Wired), enter the address and click Add/Update.
Secondary addressing
Besides primary addresses, Link also supports secondary addressing, where the meter is added directly by its serial number. Under 4. Meter Administration → Secondary (Wired), enter the 8-digit serial number (e.g. 00012345) and click Add/Update. The Mfr, Ver and Type fields are optional and narrow the selection if several meters share a serial number. Before every reading Link selects the meter by M-Bus secondary addressing, so it can be read without a known primary address — handy when several meters ship with the same primary address.
Reading
Click Start Read to begin continuous polling. The read interval (default 15 minutes) sets how often meters are queried; change it and click Set Read Interval.

Wireless meters (RelAir R2M)
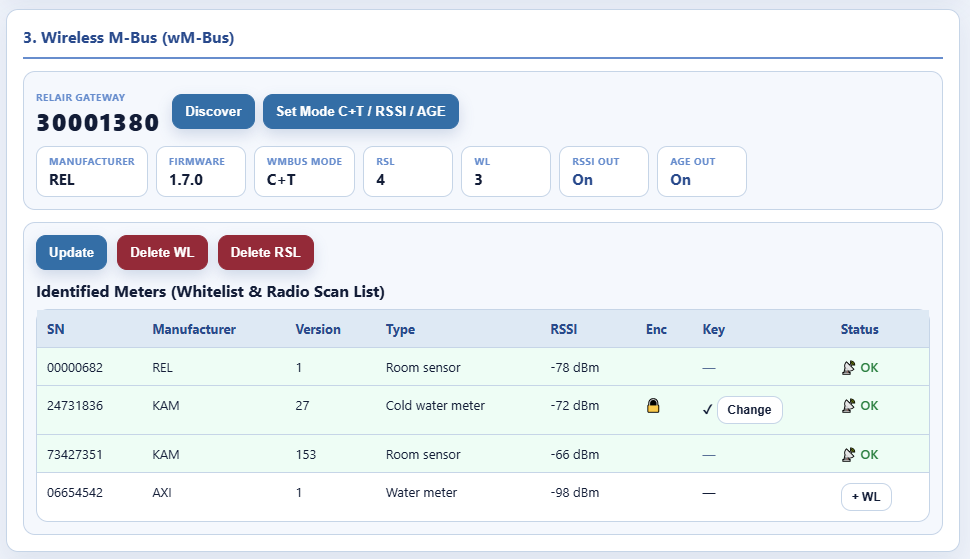
Wireless M-Bus meters are received through a RelAir R2M gateway (requires the wireless license). The gateway picks up telegrams in mode C and T. Secondary addresses are 8-digit decimal identifiers, e.g. 00012345.
Setup
- Connect the RelAir R2M to the M-Bus wired interface.
- In 3. Wireless M-Bus, click Discover — the gateway is auto-detected.
- Click Set Mode C+T / RSSI / AGE to configure reception.
Radio scan list vs. whitelist
- Radio Scan List (RSL) — every meter the gateway hears, auto-populated with signal strength (RSSI) and encryption status.
- Whitelist (WL) — the meters you actually want to read. Only whitelisted meters are processed. Add a meter from the list with the + WL button.
AES encryption
Encrypted meters need a 128-bit AES key — enter the 32-character hex key with the Change / key button. The key status is validated against incoming telegrams:
- OK — decryption successful.
- Wrong key — telegram received but decryption failed.
- No key — encrypted meter without a stored key.
Modbus TCP server
The built-in Modbus TCP server (requires the modbus license) exposes meter data as holding registers for a building-management system.
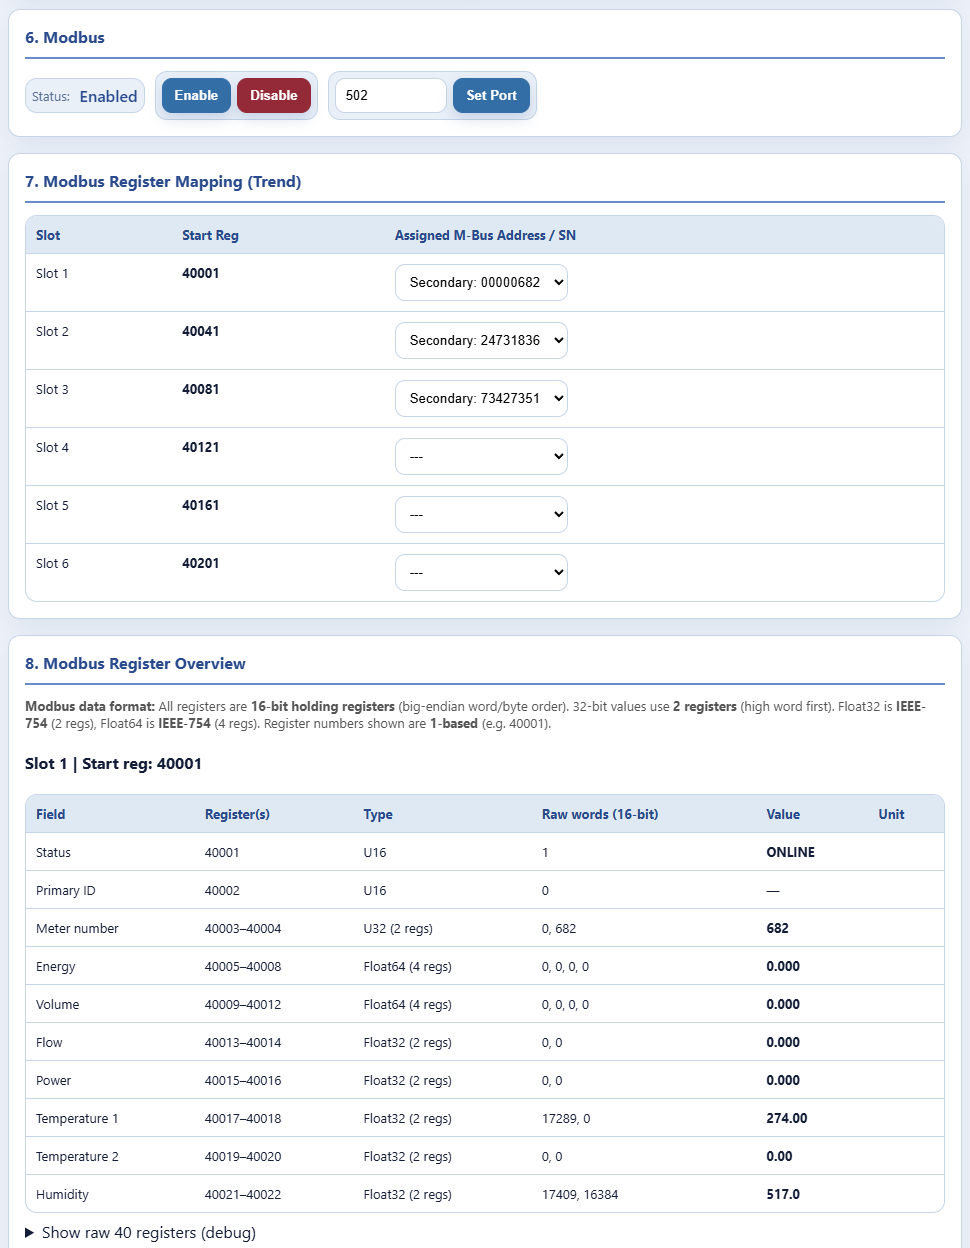
- Enable/disable and set the Port in section 6. Modbus (default 502, configurable 1–65535).
- Slots — 6 meter slots, each mapped to 40 consecutive holding registers.
Register layout (per slot)
| Offset | Field | Type | Registers |
|---|---|---|---|
| +0 | Status | U16 | 1 (1=online, 0=offline) |
| +1 | Primary address | U16 | 1 |
| +2–3 | Meter serial | U32 | 2 (high word first) |
| +4–7 | Energy | Float64 | 4 (IEEE-754, big-endian) |
| +8–11 | Volume | Float64 | 4 |
| +12–13 | Flow | Float32 | 2 |
| +14–15 | Power | Float32 | 2 |
| +16–17 | Temperature 1 | Float32 | 2 |
| +18–19 | Temperature 2 | Float32 | 2 |
| +20–21 | Humidity | Float32 | 2 |
| +22–39 | Reserved | — | 18 |
Slot 1 starts at register 40001, slot 2 at 40041, and so on.
Field mapping
Each slot auto-maps the meter's M-Bus values to the Modbus fields. When a meter exposes several values of the same type (e.g. multiple energy registers), you can override the auto-selection in section 7. Modbus Register Mapping (Trend). The resulting layout is shown in section 8. Modbus Register Overview.
User MQTT broker
By default, meter data is published to the EasySense management broker. With the mqtt license feature you can point Link at your own broker instead.
Under 1. Administration → User MQTT Broker, enter the host, port, username and password, optionally enable TLS, and click Save. When configured, meter data is routed to your broker. Device management still works from either broker, and command responses always return to whichever broker sent the command.
Firmware updates & rollback
Link can update itself over-the-air. In 1. Administration → Firmware, click Check for updates, pick a compatible version from the dropdown and click Update. Link downloads the package, verifies its SHA-256 checksum, checks OS compatibility, installs it and restarts the service automatically.
Rollback
Before each update the current version is backed up. If an update causes problems, click Rollback (it shows the backup version and timestamp) to restore the previous version and restart. One rollback level is kept — the most recent backup.
Logging
- System log — Link logs to the TRB143 syslog. Download it from 1. Administration → System Log.
- Log level — adjustable at runtime (DEBUG, INFO, WARNING, ERROR) from the portal.
- Remote monitoring — operational messages are also published to the EasySense platform for remote diagnostics.
Normal operation
Once configured, Link runs unattended: on boot it connects to the broker and registers the device, validates the license, then continuously polls meters at the set interval and publishes the parsed data. If Modbus is enabled it keeps the holding registers up to date, and it sends a periodic heartbeat to the platform.
Troubleshooting
| Symptom | Likely cause | Resolution |
|---|---|---|
| No meter data | Reading stopped or no meters configured | Start reading; verify meter addresses |
| “Serial port not available” | Hardware or config issue | Check M-Bus wiring; verify serial port config |
| Wireless meters not appearing | Gateway not discovered or not whitelisted | Run Discover; add to whitelist |
| “Wrong key” on a wireless meter | Incorrect AES key | Re-enter the correct 32-hex-char key |
| Modbus registers all zero | Slot not mapped or meter offline | Assign a meter to the slot; check the meter responds |
| License expired | Time-limited license | Install a new license or contact support |
| Firmware update fails | OS incompatible or network error | Check the device OS version; verify connectivity |